- Online Fax >
- Windows-8-Fax
How to Fax From Windows 8
Fax service for Windows is not a familiar term. Many of us know that to send a fax, you must have a fax machine. However, with the advancement in technology, there are countless services that can send or receive faxes online. And using a Windows 8 computer is one of the simplest ways to send a fax.
There are various options for sending and receiving a fax from Windows 8. Let’s dive in and explore each of them in detail.
Part 1: How to Fax from Windows 8 with CocoFax
Windows 8 default faxing service has its limitations; thus, a third-party service comes to the rescue. An online fax service tool provides an easy and straightforward process of sending a fax through Windows 8.
1.1: CocoFax- Windows 8 Online Fax Best Friend
CocoFax is an innovative online fax service solution with bleeding-edge technology that takes advantage of the Windows 8 operating system and integrates it with the old school fax machine. Any person with a fax number can send and receive a fax via CocoFax.
The requirements include:
- A Windows 8 laptop or PC with a reliable internet connection
- An installed web browser
- A CocoFax account along with a fax number.
1.2 The Straightforward Way of Sending Fax from Windows 8 via CocoFax Web App
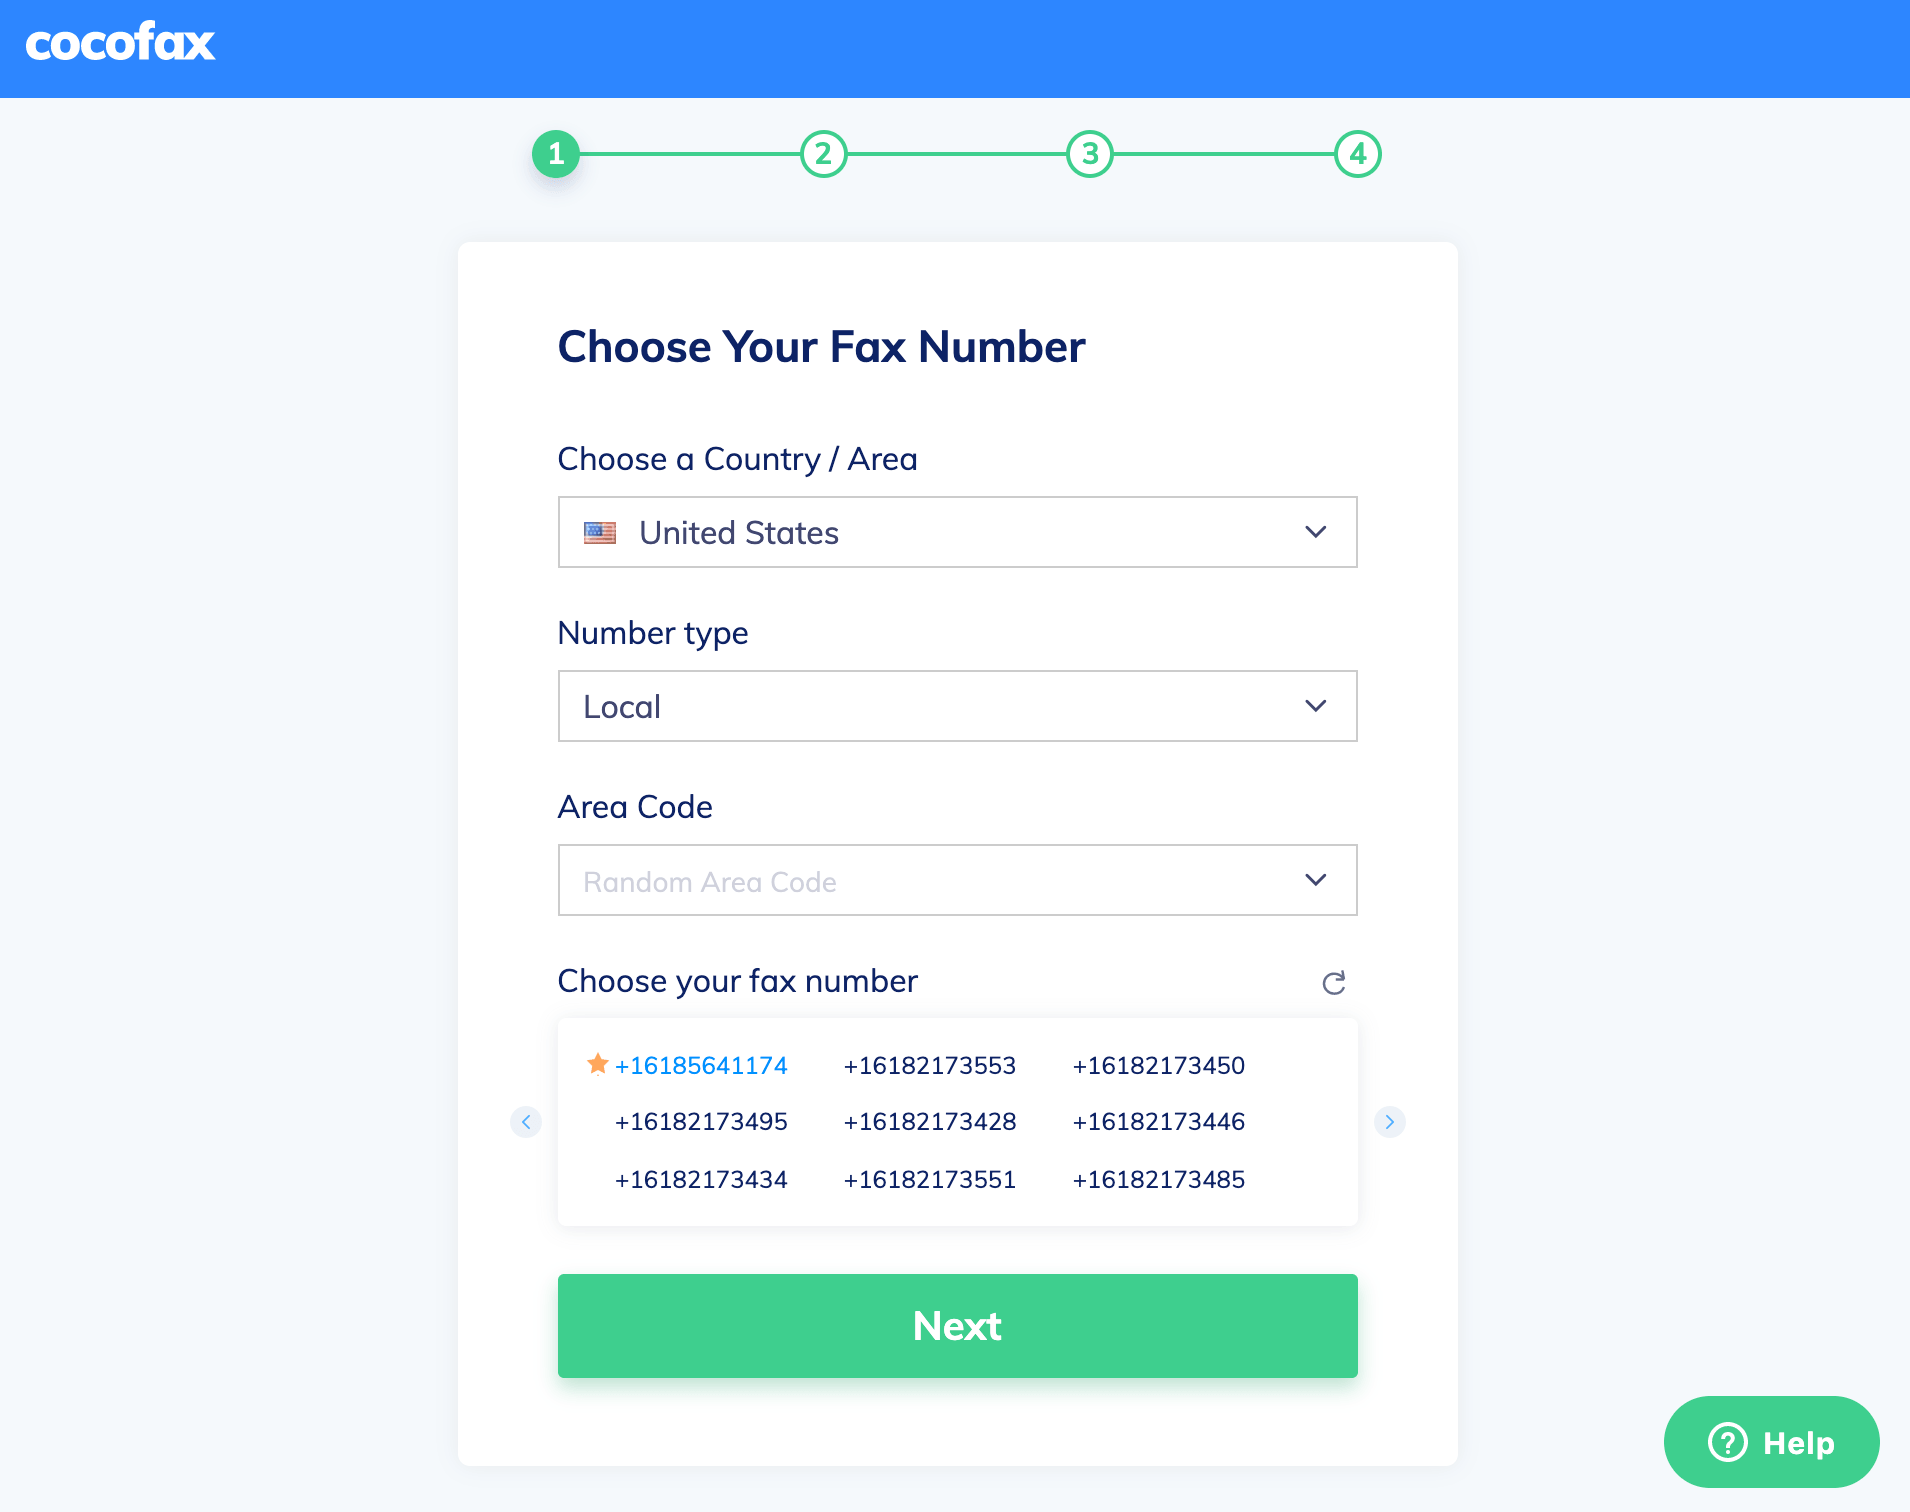
Before you send and receive a fax from Windows 8 via CocoFax, you need to get the fax number. CocoFax offers a straightforward way to get one for free. The steps involved include:
Step 1: Get started by choosing your fax-free number. Then, purchase a subscription plan that suits your needs.

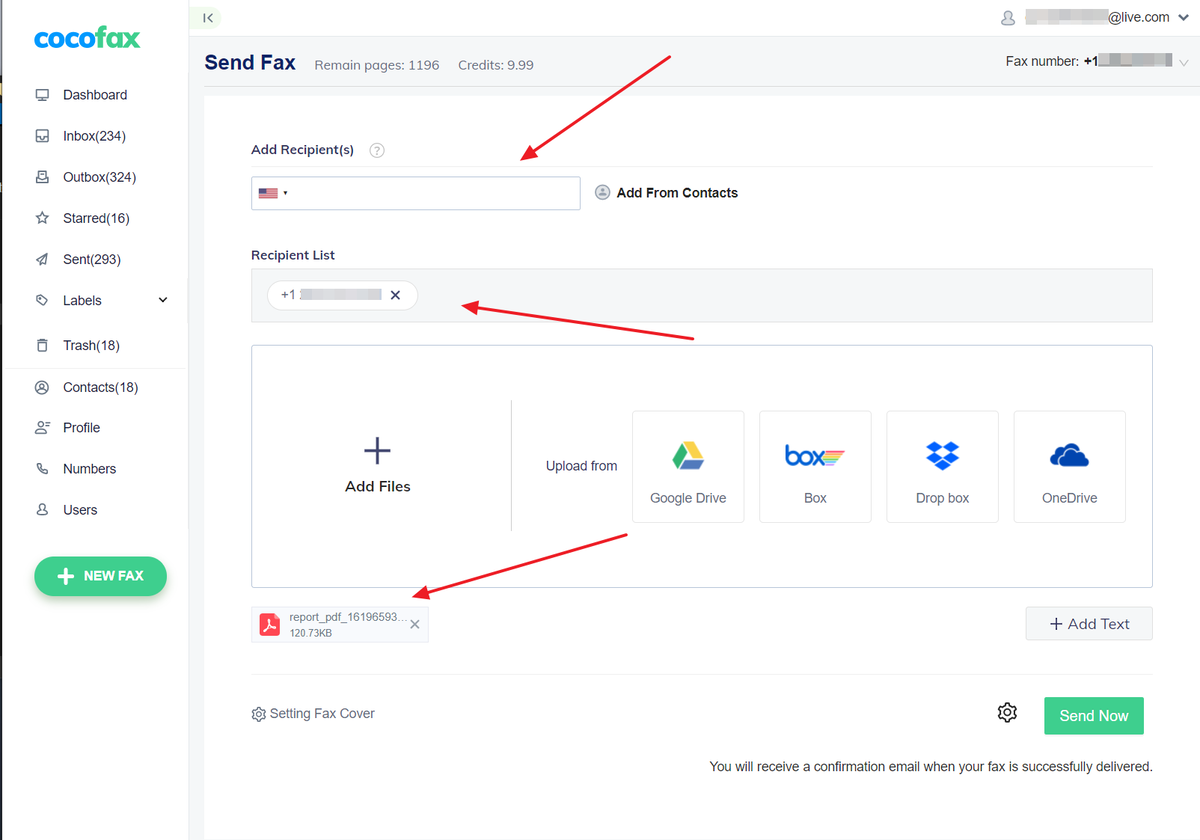
Step 2: Once you have an account, log in to the CocoFax portal and click ‘New Fax’. Next, enter the fax address of the receiver and type your fax message on the cover letter or upload the document that you wish to fax.

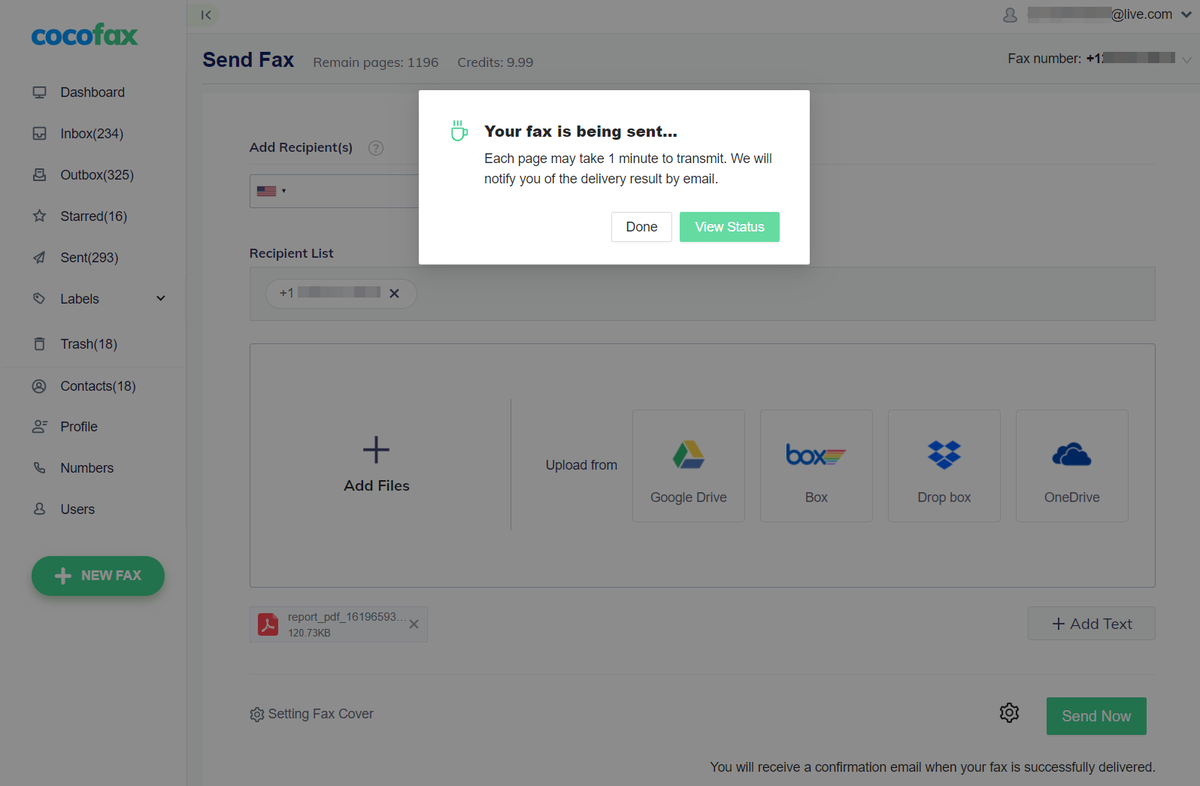
Step 3: Hit the ‘Send Now’ button. Once the fax is received, CocoFax will send a successful transmission message. If the fax is not successful, you will receive a notification via the email that you registered with.

If you experience unsuccessful fax transmission, possible reasons include an incorrect recipient’s fax number, a busy signal, or the fax machine switched off at the end of the line.
You can also watch the video below:
To receive faxes with CocoFax doesn't involve many steps. Just log in to your CocoFax account, access the dashboard, and click on the ‘Inbox' tab to check all received faxes. Note that the sender has to have your fax number to send the fax.
Part 2: Fax from Windows 8 with Email-to-Fax Technology
You can also use CocoFax to send a fax to any person via your email, be it Gmail or Yahoo mail, or any other mailing client. Traditionally, a fax machine communicates through analog transmission, where fax messages are transmitted in the form of telephonic signals. On the other hand, email address communication works on a digital medium, and data is sent and received over an internet connection.
This is where our CocoFax services facilitate the process, where it acts as an interceptor between you and the other person’s fax machine. Therefore, if they are sending a fax to you on your fax number, CocoFax will translate that fax and forward it to you as an email and vice versa.
Check out the steps below and learn how to send a fax from email easily.
Step 1: Sign up with CocoFax using your active email address.
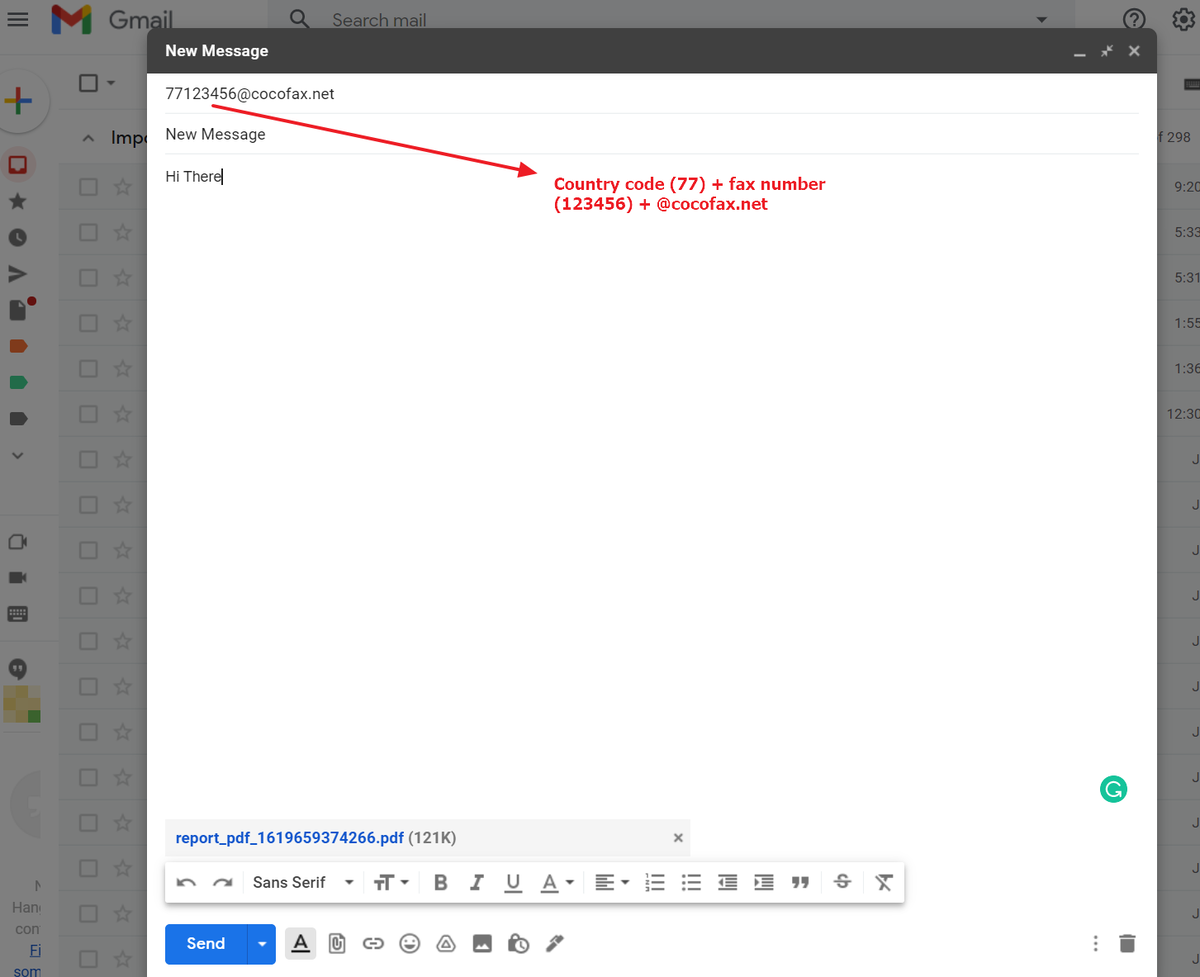
Step 2: Open your email client, click the 'To' field, enter the recipient’s fax number, follow the recipient’s country code, and then add ‘@cocofax.net’.

Step 3: In the email body, type in the appropriate heading in the ‘Subject’ field. You can add a cover letter or click on the paper clip icon to attach the fax document, including PDF, Doc, Docx, Xls, XlSX, PNG, JPG.
Step 4: Click on 'Send’. Once CocoFax receives the email, it’ll translate it to a fax document. You will also receive an email notification stating that your fax has been sent successfully.
To receive a fax directly via email, provide your free fax number to the sender. Then navigate to the inbox of your email, which is registered with CocoFax. Next, search for the mails, open and download the attachment.
You can also watch the video below:
Part 3: Sending Fax from Windows 8 Using Fax and Scan
If using a third-party fax service is not an option for you, Windows 8 comes with its pre-installed 'Fax and Scan' feature. However, using it comes with specific requirements: A fax machine or a multi-purpose printer that can scan, print, and fax, and telephone lines.
Once you have these requirements, proceed to configure Windows Fax and Scan.
- Click on the Start Menu and search for Windows Fax and Scan.
- Once the program is opened, go to Tools then Fax Accounts.
- Click ‘Add’ to select the fax modem.
- Select between Automatic or Manual Answering phone lines.
Once you have configured the hardware correctly, you can start sending and receiving the fax.
Step 1: Open Windows Fax and Scan application and click on 'New Fax'.
Step 2: Once the new popup window is open, input the receiver's full name and fax number in the 'To' field.
Step 3: Enter the cover message or click on the ‘plus’ icon to attach the files you wish to fax.
Step 4: Confirm everything is correct, then hit the 'Send'. Once the receiver receives the fax, you’ll get a confirmation.
You will need to set up Windows Fax and Scan to receive a fax from a Windows 8 computer automatically. Here are the steps:
- Open Windows Fax and Scan and select Tools > Fax Settings.
- In the Fax Settings dialogue, click on the General tab to see Send/Receive options.
- Check the ‘Allow the device to receive fax calls’ option.
- Once configured, close this dialogue box.
- Go to the Fax> Inbox to see the received fax files.
Final thoughts
Fax software for Windows is a lot easier than using an actual fax machine. However, CocoFax services provide a more relaxed approach to faxing than Windows 8 Fax and Scan. Remember, the Windows 8 computer can only send and receive faxes via phone line and not via an internet connection.