- Online Fax >
- Windows-7-Fax
How to Fax from Windows 7
With the advent of Windows 7, sending and receiving faxes has probably become easier than you think. The most known method is to connect the Windows 7 computer with a fax machine and send the faxes manually. However, this method isn’t favored by many, as high-end fax machines can cost thousands of dollars.
To help you out, we have various other methods on our list, by which you can send and receive faxes from Windows 7, without the use of a fax machine.
Part 1: CocoFax - The Complete Online Fax Solution
CocoFax is an online fax service, which allows its users to send and receive faxes using computers. All you need to do is, sign up with CocoFax and connect your Windows 7 with a stable internet connection. CocoFax will act as an interceptor and transfer the fax to the recipient’s fax machine.
Why Do You Need CocoFax?
Fax travels via an analog electronic signal, one found in telephone lines. Thus, traditionally fax required setting up telephone lines with your fax machine (or computer with a fax modem) to send or receive a fax.
However, your computer works in a digital language, and therefore cannot communicate directly with another person’s fax machine (as both employ different signals). Thus, CocoFax acts as a translator and communicates your fax document to the receiver. Similarly, when someone sends you a fax, CocoFax collects it and forwards it to you.
CocoFax values your privacy and ensures that your content is completely confidential. You can refer to CocoFax’s HIPAA Compliant Faxing and PHIPA Compliant Faxing pages to understand our policy better.
Salient Features of CocoFax
Here are a few of features of CocoFax online fax service:
Web Service
CocoFax offers you ultra-portable service, which can be used from anywhere. You don’t have to download CocoFax on your PC to use it, simply login to our website, go to our dashboard, and practice the application.
Windows Compatible
We understand your love for Windows, after all, it's so awesome. So even if Microsoft pulls out its support from Windows 7, CocoFax will continue to provide you with all its services. In short, CocoFax can also assist you to fax from Windows 8 and Windows 10.
Data Security
CocoFax has implemented cutting-edge technology such as two-factor authentication, biometric security measures, web application firewalls, DDOS protection, and many more. You can refer to the security overview page to understand our data security measures better.
Pricing
CocoFax services are available at affordable prices that are very minimal when compared with the cost of the entire fax machine setup. And it offers many other bewildering features that are non-existing in even most high-end fax machines.
There exist features like high-volume faxing, seamless integration with Slack, Google products, and other apps, dedicated support, phonebook, and more, which make CocoFax, a choice for millions of people.
Part 2: Ways to Fax from Windows 7 through CocoFax
CocoFax offers you multiple ways to send and receive faxes from Windows 7. Prominent two ways among them are using CocoFax’s web app and using CocoFax’s email to fax technology.
1) Fax from Windows 7 via CocoFax Web App
Using CocoFax, you can do online faxing without the need to download any app. To understand how to do it, follow these steps:
Step 1: Go to the "Choose your fax number" page. Fill in all the required details, including your country or area, number type, area code, and choose a fax number of your preference. Proceed to choose a plan that suits your enterprise the most and completes the sign-up process.
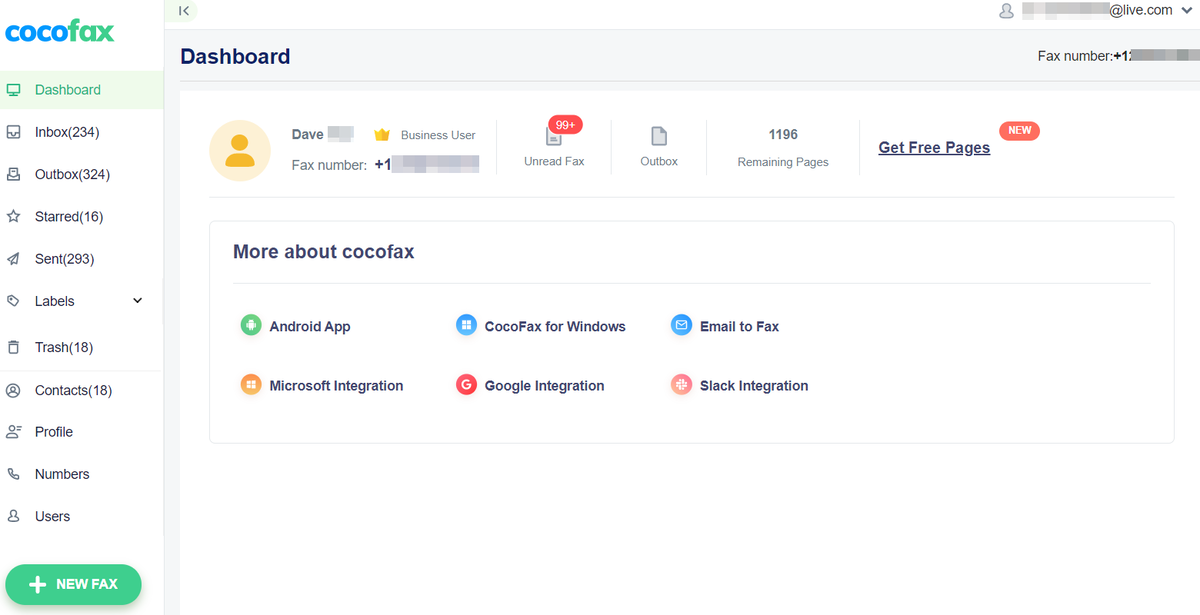
Step 2: Once you’ve completed the sign-up process, you will arrive at the CocoFax dashboard. Just click on the ‘+New Fax’ button, present at the corner of the dashboard, and a new fax window will open.
Step 3: In the ‘New Fax’ window, type the fax address of the recipient. You can even send a fax to multiple users at the same time by entering their fax numbers and separating them with a semicolon.
You also have the option to add the subject and cover page to your fax. The ‘Subject’ appears on the top of the fax document and the ‘Cover Page’ forms the first page printed out on the receiver’s end.
After filling in the above details you now need to attach the fax file. You can either choose the document from your Windows 7 or upload it directly from cloud storage like Google Drive, Box, Dropbox, and OneDrive. The supported formats of the fax file are Doc, Docx, Xls, Jpg, and Png.
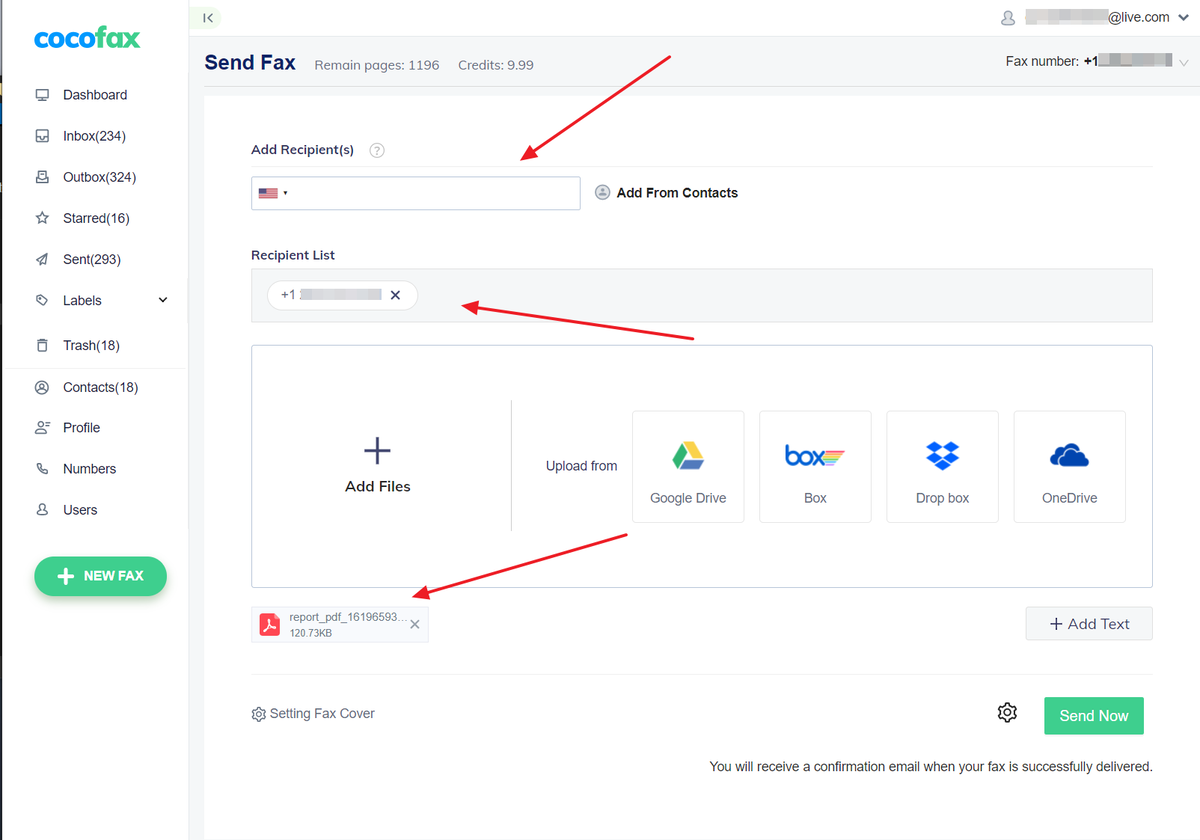
Multiple documents can also be shared via this method, you just need to upload them, and they will be merged on the receiver’s end.
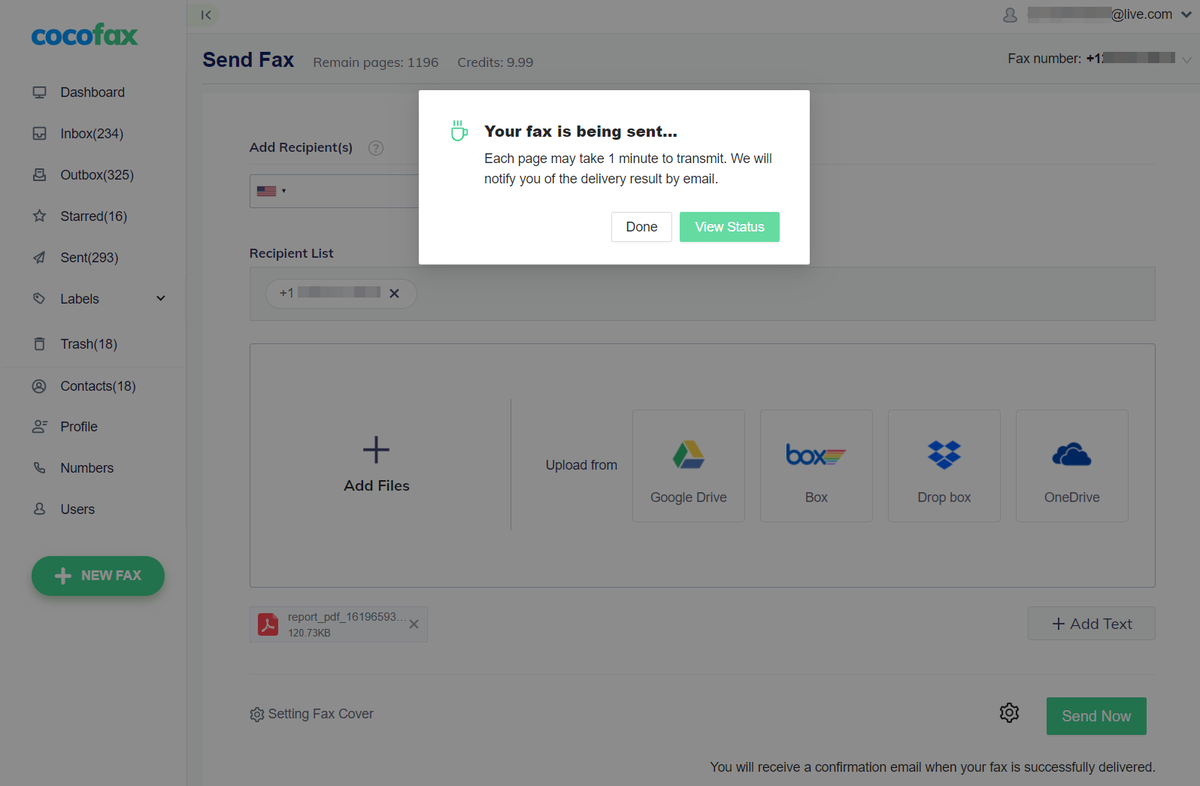
Step 4: After double-checking all the provided information, click on the ‘Send’ button. CocoFax will connect with the receiver’s fax machine and send your fax to them.
Step 5: Once the fax is delivered (or even if the transmission fails from the receiver’s end), you will get a confirmation from CocoFax on the CocoFax dashboard. In addition, these notifications are also forwarded to your email inbox.
**If your fax is undelivered, the possible reasons are that the receiver’s fax machine is busy, or it is switched off, or you’ve entered an incorrect fax number.**
2) Fax via Email Using CocoFax
Emails by default are not designed to be compatible with faxes, when you send an email directly to a fax number, it ends up being undelivered. But with the CocoFax account, you can accomplish this task easily.
You just need to follow these steps:
Step 1: Register for CocoFax with your email address, you’ll use this email address to send and receive faxes. CocoFax will hand you a fax number thereupon.
Step 2: Open the email client on Windows 7, either using the web browser (like gmail.com, yahoo.com, or any other) or through a mail application such as Outlook on Windows 7.
Step 3: Go to the option of creating a new email (the new email popup will open up). The details of the fax you will be sending will be filled in here.
In the ‘To’ field, enter the country code, followed by the fax number of the receiver and ‘@cocofax.net’. For example, if the fax number is 123456, and you have to send it from the U.S. to the U.S., then you’ll enter: [email protected]
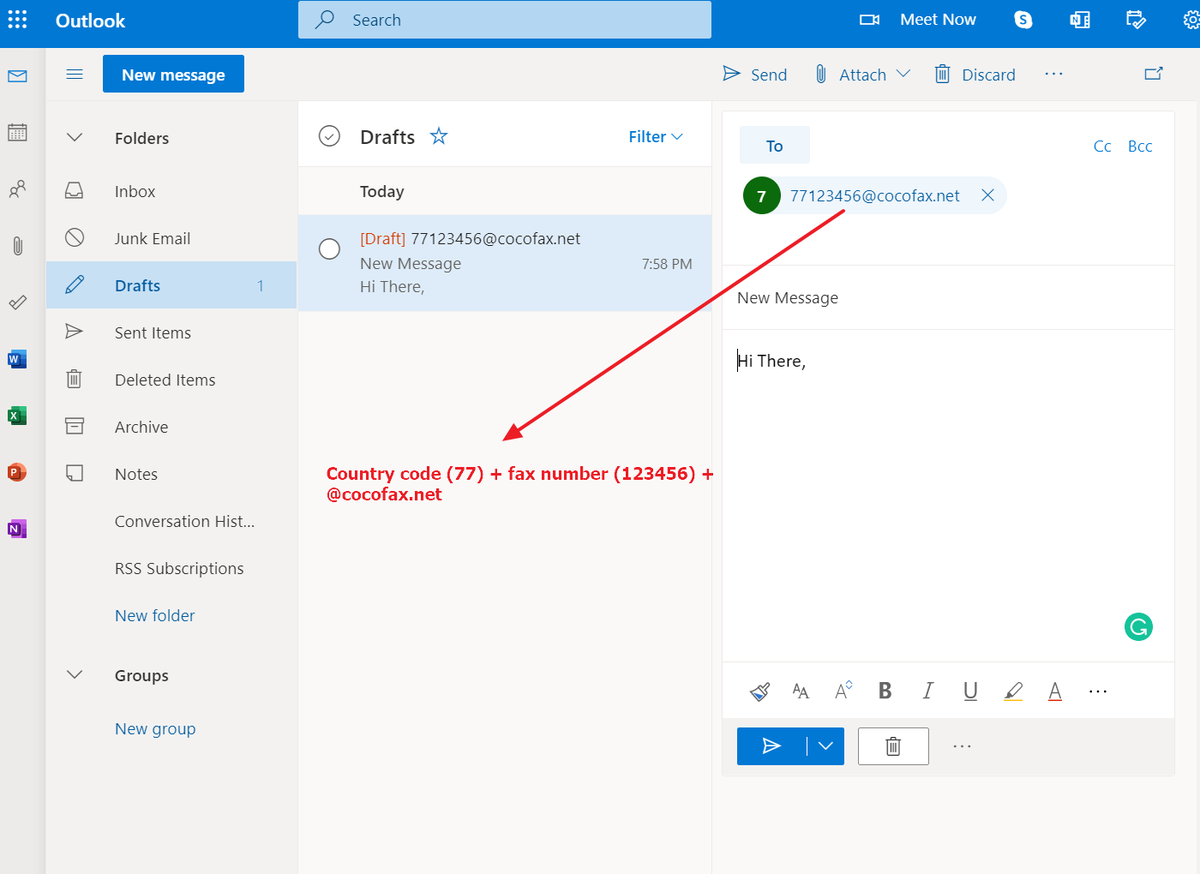
Note: Even when a fax is sent from the same country, you still need to add the country code.
Now fill in the ‘Subject’ to the email, that appears on the top of the fax document. The body of the email forms the cover page of the fax, which is the first page of the fax document for the receiver.
Attach the fax document in the format: Doc, Docx, Png, Jpg, Xls, or Xlsx. Do make sure that your document doesn’t contain any special character in its name.
Step 4: Once you click on the ‘Send’ button, CocoFax will translate it for the receiver’s fax machine. When the fax gets delivered (or even if the transmission fails on the receiver’s end), you will get a confirmation in your email inbox, containing all the details of the fax.
You can also watch the video below:
How to Turn on the Email Notification via CocoFax
CocoFax ensures that the process of receiving a fax in your account is seamless and easy. This feature is turned on for you by default, but in case you have difficulty in receiving emails, you can follow the following steps to receive a fax using CocoFax’s fax-to-email feature:
- Login to your CocoFax account
- Go to Profile → Account
- Search for ‘Email information’ in the ‘Notifications’ section and select Edit
- In the Received Fax Notification box, choose On (Notify and Attachment)
- To add multiple email recipients, click on the ‘Add’ button on the lower right side
Every new fax notification in your email inbox will contain the elongated details of the received fax, including the fax number of the sender and the time logs. The most important benefit of email to fax technology is that you can check your faxes through your smartphone even if your Windows 7 computer is not with you.
Part 3: Another Method to Fax Online: Windows Fax and Scan
You might not be aware of this exceptional feature of Windows 7, that Windows 7 comes with a Fax and Scan option by default. Using this option, you can send and receive faxes directly from your computer.
Even though Windows Fax and Scan is free to use, you will have to add a Fax Modem to your computer and connect the scanning machine to your computer to scan fax documents other than those already present on your computer. Also, to start with the faxing process on Windows Fax and Scan you will need to get a fax number.
The detailed steps that need to be followed to use this app are as follows:
**Windows Fax and Scan is only Windows software. You can learn how to fax from a Mac here.**
Sending Fax from Windows 7 using Windows Fax and Scan
Step 1: Get a fax modem and connect it to your computer using the instructions on the fax modem’s OEM.
Step 2: As your computer doesn’t come along with a port for a telephone cable, connect the telephone line to the fax modem only (this is why a fax modem is required).
Step 3: When all the connections are made and the drivers have been installed, open Windows Fax and Scan. Go to ‘Start’>>’ All Programs’>>’ Windows Fax and Scan’.
Step 4: Once the ‘Windows Fax and Scan’ window opens, select the ‘New Fax’ option. You will be asked to connect to a fax modem or a fax server, choose the fax modem option. The New Fax popup will open thereupon. Fill in the fax details for the new fax document here. In the ‘To’ field, enter the fax number of the receiver, you can also enter multiple fax numbers.
On top of the Windows Fax and Scan, you’ll find the option to add a cover page (which is optional). If you go with ‘None’, no cover page will be added. Similarly, if you wish to fill in the ‘Subject’ field to the fax document then add, otherwise, this can also be left blank. Later, attach your fax document (or documents) in the required format.
Step 5: After filling all the fields, click on the ‘Send’ button, and your fax will be sent. On delivery, you will receive a confirmation message shortly.
You can also watch the video below:
Receiving Faxes on Windows 7 through Windows Fax and Scan
Windows Fax and Scan is a free Windows fax software that provides you with receiving a fax facility as well. However, if you’re expecting that the process to be as simple and automatic as CocoFax, you’ll be disappointed.
To receive faxes on Windows Fax and Scan, you need to turn your computer on at all times. Even when your computer turns off for a short while, faxes received during that time won’t be delivered to you.
Conclusion
So, now you are aware of all the different methods to fax using Windows 7, without the need for a fax machine. Online fax servicing platforms like CocoFax are easy to use and fun. Whereas, even though Windows Fax and Scan is free to use, it is not as simple or independent as CocoFax. You need to set up additional hardware (like a fax modem and telephone line) and get the fax number from your telephone company.
If all that is fine with you, you can certainly make use of the Windows Fax and Scan feature happily. Whichever method you decide to choose, our main motive is just to make you aware, so that you can make a wise decision.